Wednesday, February 11, 2015

A fully fused top!

I've completed fusing the top for Tree #7.
I'm happy with how it looks so far. One of my favorite things about this technique is it's so easy to make changes.  Below, you can see an earlier version.  This previous attempt looks unbalanced, I think, because the left right corner is so much darker than the left top corner. It was so easy to pull off some snippets from both sides, shuffle them around and add some more, and fuse it again.

Next I need to piece together a backing and do the basting.  But first, I have to face the mountain of snippets on the studio floor. That's one drawback to this method- the snippets are threatening to take over my apartment!

Saturday, January 31, 2015

Increasing my productivity

I've been wanting to increase my quilting productivity, so I set a goal of quilting 30 hours this month.  So far so good!  I just finished a fun quilting session that brought my monthly total to 30.33 on the final day in January.

Here's what I have to show for it:  some significant progress on Tree # 7.

Here are some strategies that have been helpful for me in increasing my quilting time:
1.  I start by setting the kitchen timer, usually for an hour.  This way I stay focused and productive until the timer goes off, so I don't wander off and check Facebook. When the timer goes off, I either take a break or set it again.
2. I sometimes listen to audiobooks or music to stay motivated.
3. I record the total time I quilt each day on my calendar.
4.  I made a quick graph of this info:
Here's what I noticed from the graph:
There's so much variability, with a peak of 4 hours of quilting (that was on a snow day when I didn't have to work).  But there were 14 days with no quilting at all!  For February, I'm setting a goal of 33 hours.  I'll try to combat those 0 hour days by setting my alarm early and quilting before work.

I'm also experimenting with ways to make my quilting more efficient, so I get more done in the time available. That's a topic for another day.
 
What are your best tips for increasing quilting productivity?

Friday, January 9, 2015

Making progress

I'm making steady progress on Tree #7.  I made a New Year's resolution to quilt 30 hours a month, and so far I've been really good at sticking to it.

I'm trying to incorporate bigger pieces, with motifs cut out from large-scale prints.  Here's one of my favorite parts- a little armadillo peeking out. 


Here's a few more close-up shots:


I love these blue birds!  I have some pink fabric with birds from the same fabric line, which I'm going to use in the background.  I'm thinking I'll make the background mostly pink, with some yellow. 
My goal is to have all the fusing completed by the end of January. 

In other quilting news, I recently joined SAQA (Studio Art Quilt Associates).  So far, I've been really happy and excited with the opportunities from this group and I'd recommend it to anyone interested in learning more about art quilting. 

I'm linking this post up with Off-the-Wall Fridays.  Check it out to see many other exciting artists at work!

Thursday, January 1, 2015

2014 year in review

Since I've neglected my blog for much too long, I'm going to do a quick wrap up of highlights from 2014, so I feel ready for a fresh starts of quilting goals (and blogging goals!) in 2015.

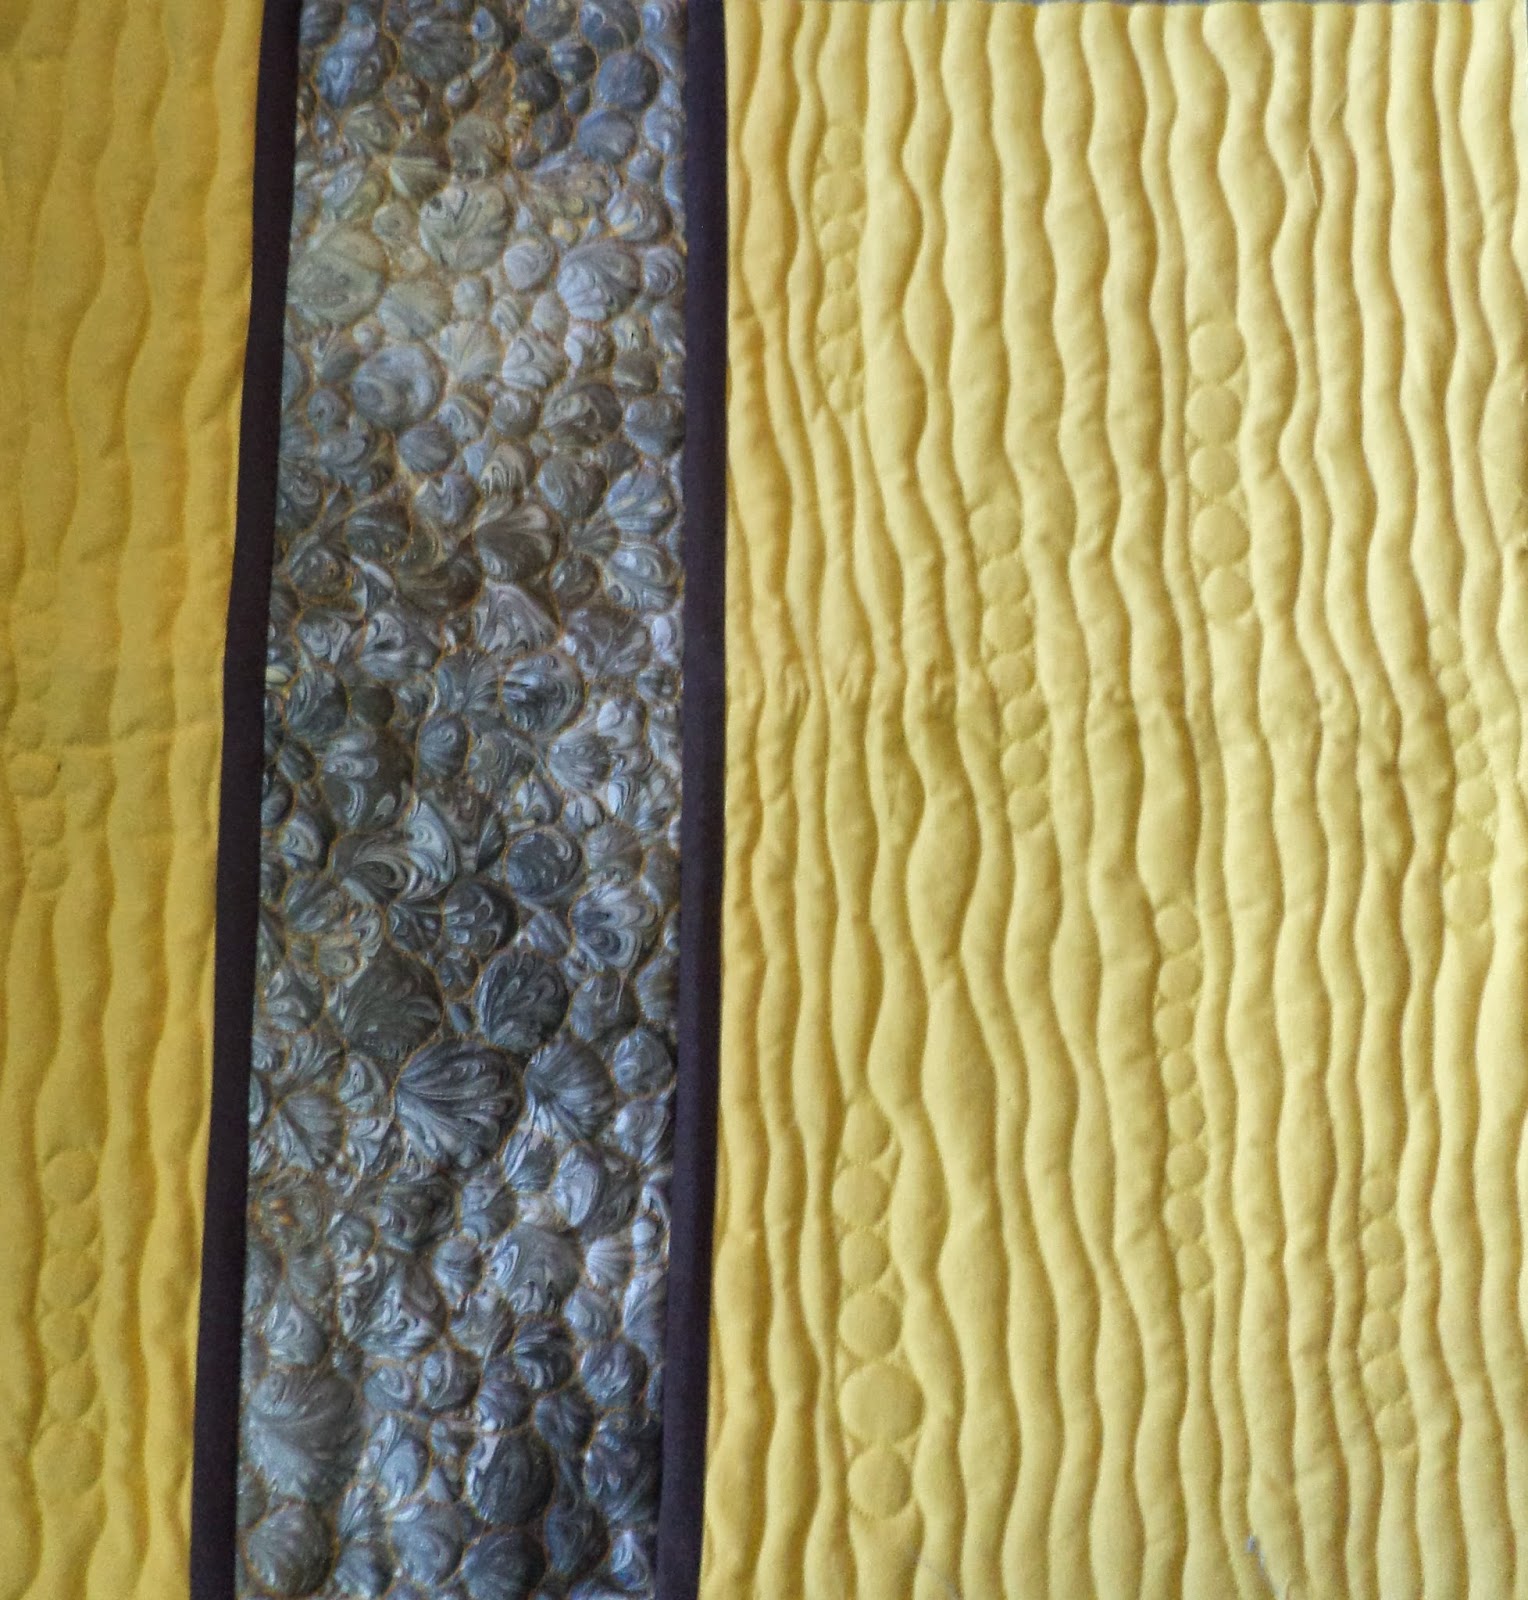
I finished Tree #5 (well, except for that hanging sleeve, but I'm going to still count it.  Don't tell the quilt police.) Overall, I'm happy with it, because I like how it has a range of values, from light to dark, and the bark actually resembles a sycamore.  An area that needs improvement is the transition from yellow to gold on the right hand side in the background.  It is too abrupt- it looks like a line, instead of the more gradual transition I managed on the left.
 Here's a closeup to show the quilting:

And here's a view of the back, which I really like:

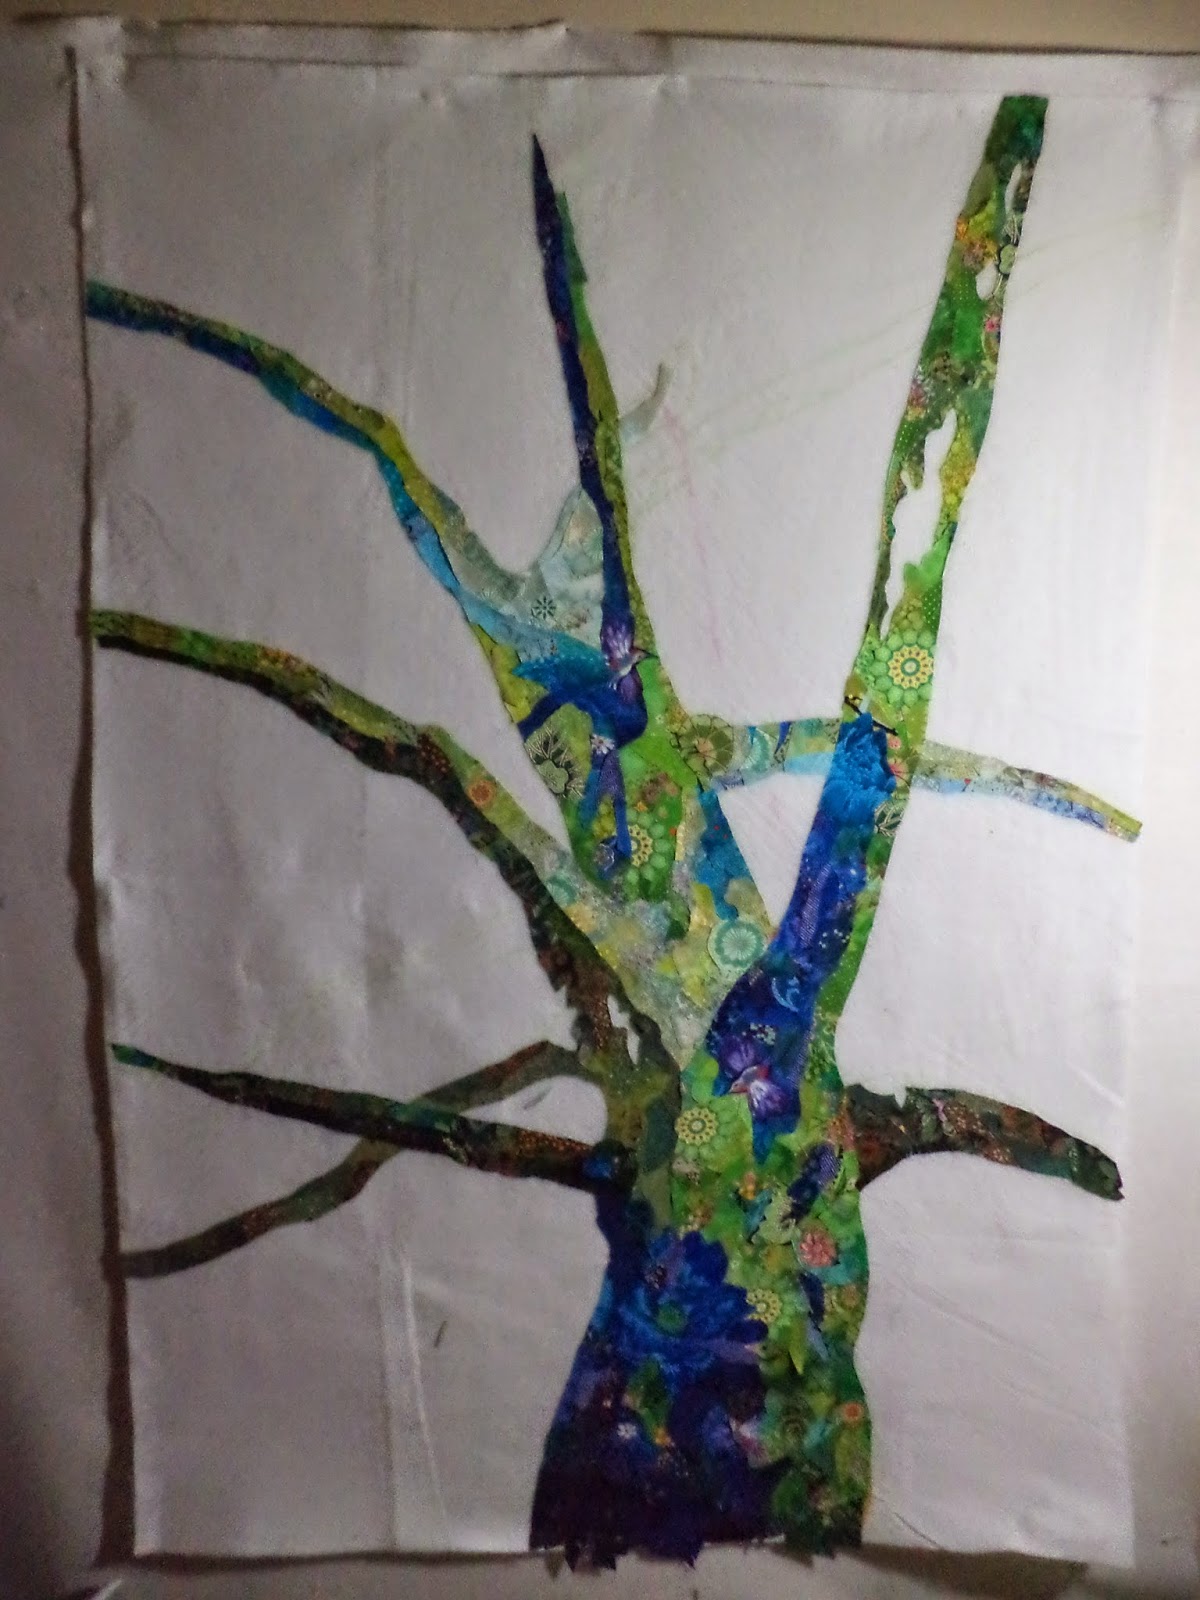
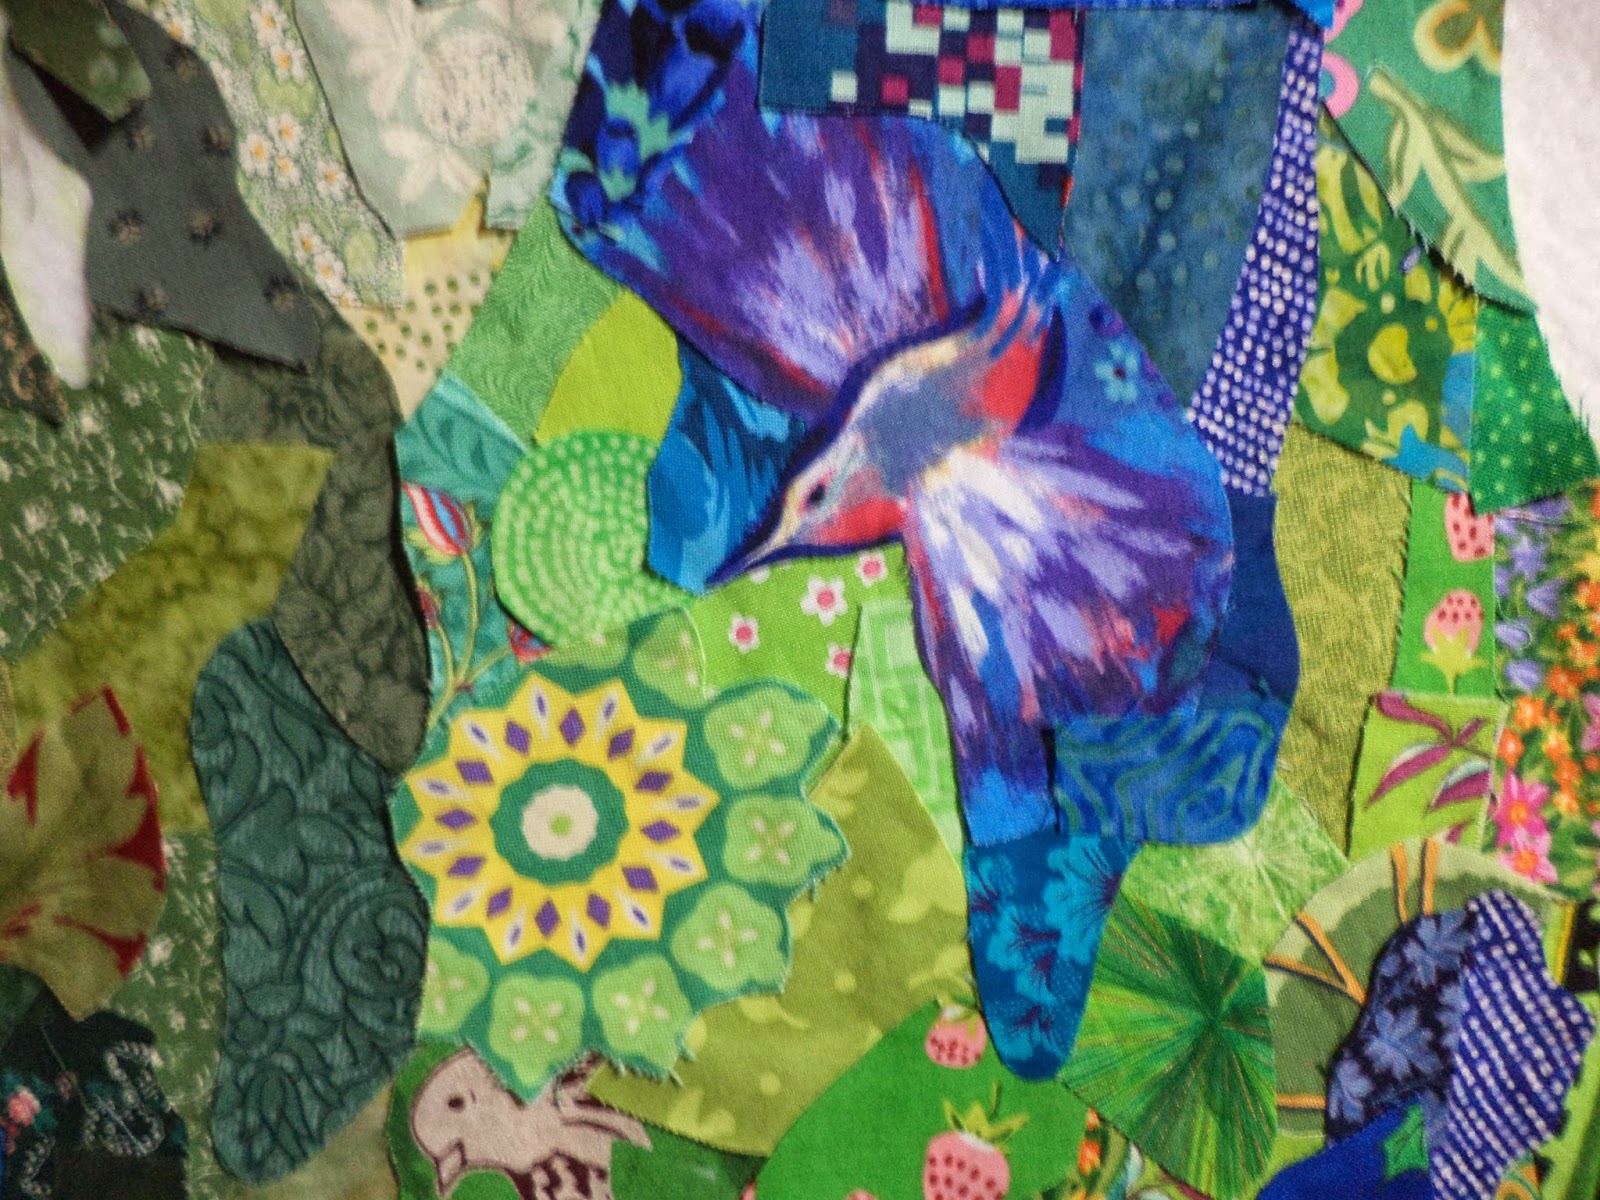
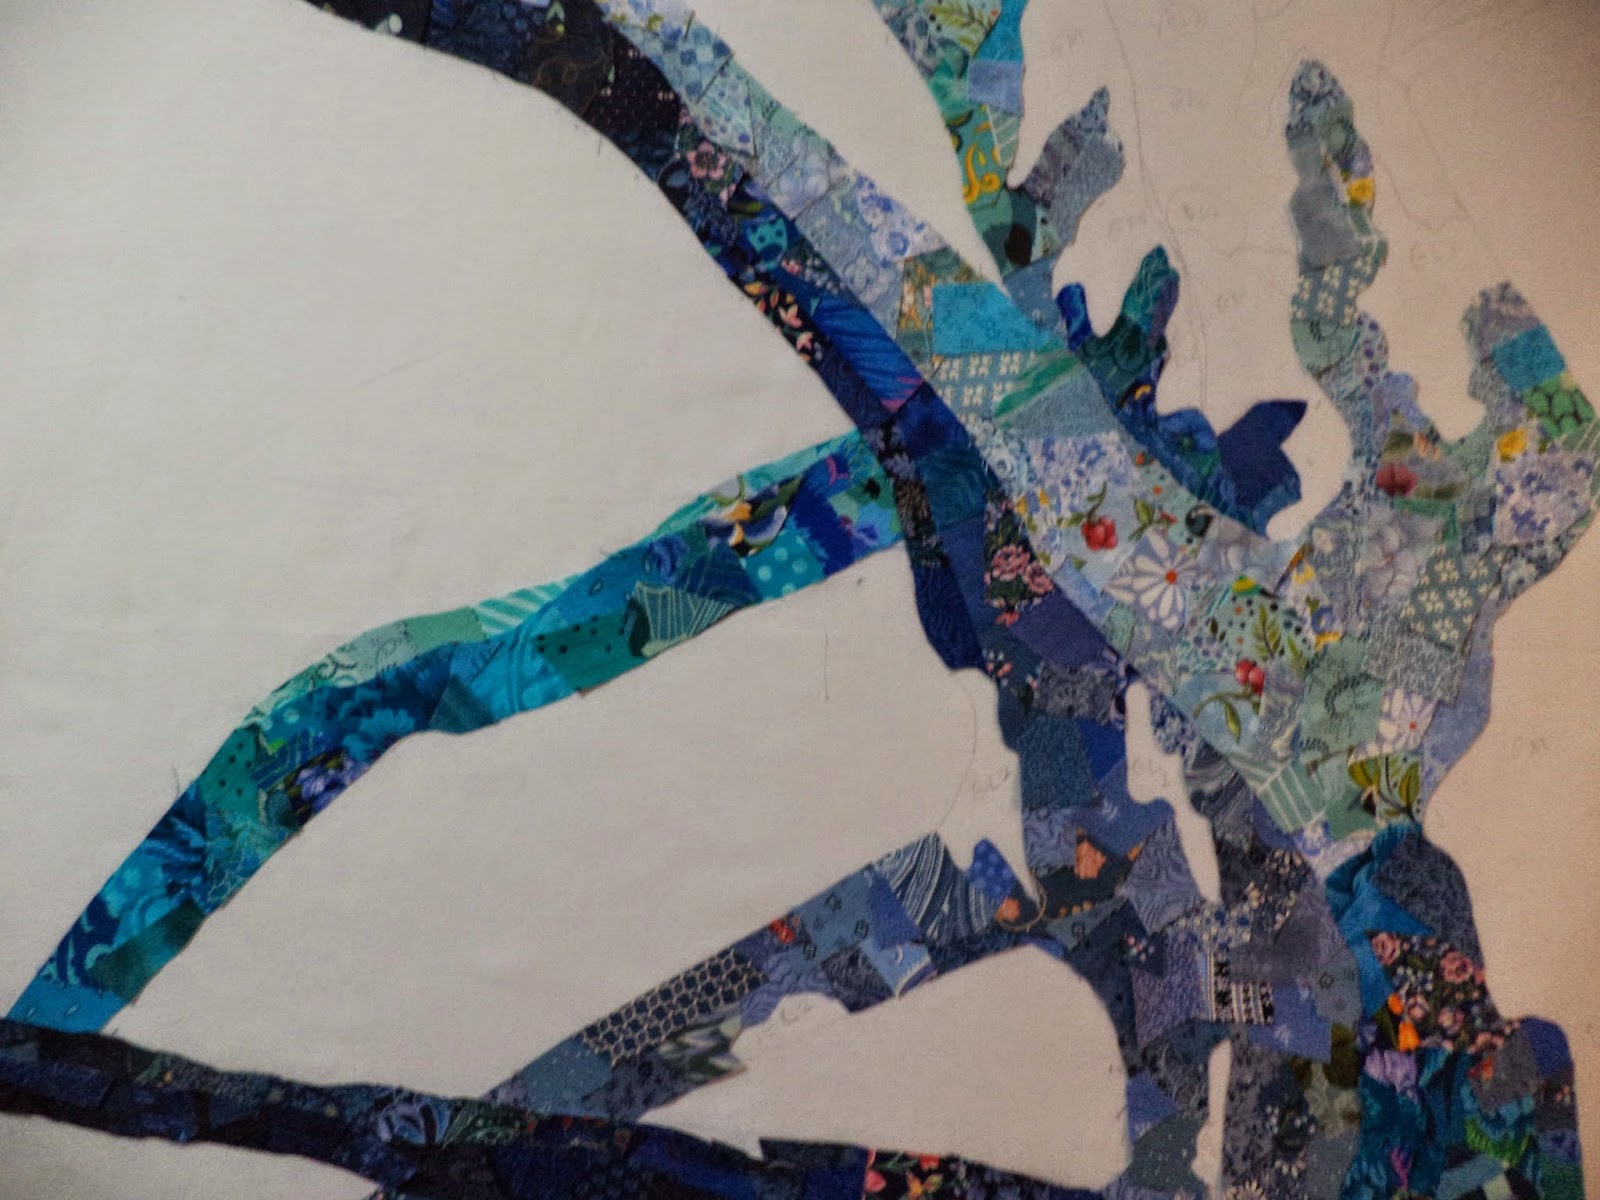
I've also finished Tree # 6, and weirdly enough I can't find it right now to take a picture of it. (I'll take that as a sign that I should clean my sewing room!)
But here you can see it during the basting:
 I put a wash-away stabilizer over the snippets, and then rinsed it out after quilting.  It looks like a sheet of plastic, but it made the quilting much easier and it dissolves completely.

I also made this quilt with LED accents, which I'm tentatively calling "Effervescent." 

I'm still working on a video to show the LEDs in action.  
And to finish off the year, an LED bracelet.  It's hard to tell from the picture, but there is a twinkling light in the middle of the star.


And one last highlight from 2014- Seeing my quilts hanging in the Fine Arts division at the Ohio State Fair. 

I hope 2014 was full of happy and productive quilting for you too.  Here's to a great 2015!


Friday, July 11, 2014

Light it up!

Usually when I start a new project, I have at least something of an image in my mind.  Well, this time, I have started with an idea, and I'm still trying to get to the image.

I want to do something with fireflies, glittering and flittering across the surface of the quilt.  But in a subtle, lovely way. Not tacky.  And I have decided I want to do this with LED lights.

I found a neat website, SparkFun, where you can find LEDs and all the accessories you need, and read lots of tutorials about how to make it all work.    Also, check out Sew Electric. These tutorials are designed for kids, and may especially appeal to girls or anybody interested in sewing as a way to learn about electronics.

This is what my setup looks like, on a scrap of fabric I grabbed from my cutting table:

The red cord connects it all to my computer, the purple circle is a tiny computer called a Lilypad, and I've hand-sewn a connection to an LED with conductive thread. When the project is done, it will have a battery rather than being connected to the computer, but I haven't figured out how to put the battery in yet. And this is nothing like what the finished quilt will look like- it's just a way to experiment with the LEDs.

It started off pretty easy- I made my LED blink on and off by following a step by step tutorial.  But then it got tricky.  I wanted my light to fade slowly in and out, and then pause for a few seconds before turning back on. The fading took a few hours of Googling.  That 2 second pause?  It took me two days- but I actually wrote 2 lines of code myself to make it happen!  

In this video, you should see the light gradually get brighter, then fade off, then go black for 2 seconds.


If this video doesn't play, you watch it on YouTube.

Learning new things can be fun and exhilarating, but it can also be super frustrating.  When I was trying to figure out if the thread I bought will work to carry enough current through the surface of a large quilt, reading a suggestion like this filled me with dread:  "Your safest bet on a complicated project is to calculate the resistance your circuit can handle using Ohm's Law."  What?  Should I just give up now?  But, I figured out that if you can calculate how many strips of fabric it takes to make a binding, you can calculate resistance with Ohm's Law.  

So I'm excited to be embarking on a new project.  I'll keep you posted as I learn more.  If you have experience with e-Textiles I'd love to hear about it!

Thursday, May 29, 2014

NQA show

The National Quilting Association show was here in Columbus, OH last weekend.  I've enjoyed visiting this show for a few years now, and this was the first time I entered some quilts. It was a big thrill for me to go and see them hanging up, and also to win an Honorable Mention for Tree #1.  The work of some from friends from AQA and the Columbus Modern Quilt Guild were also well represented.


It was a fun day all around, with my mom and sister coming from out of town to see the show. Dan came by in the afternoon (what a supportive guy!).  Our friend Derrick works at the convention center so he stopped by too. It is always interesting to hear the reactions of non-quilters.  They both were impressed by the range of different things you can do with a quilt.
 
Some interesting things I learned from this show:

I definitely prefer entering shows that are within driving distance.  It was great to see my quilts hanging up, rather than just sending them away.

I really love seeing tons of quilts in person, in a big range of styles. Modern, art, traditional- lots of quilts that I would never make myself but I just delight in looking at up close.  Seeing quilts in person is way better than in magazines or on blogs!

Winning a ribbon was great, but not winning a ribbon is fun too (good thing- the ribbon is an anomaly).  It was interesting to see the quilts under very good lighting from a larger distance and in a different setting.
 
The judges' comments were encouraging overall with some specific and helpful ideas for how to improve. Binding- you are my nemesis!
 
I would encourage everybody to enter their quilts in more shows!  This one is not juried; they accept the first 400 entries.  So go for it!

Sunday, March 30, 2014

Is Tree #5 turning into a UFO?

At what point does a work-in-progress become a UFO?  I started Tree #5 with great eagerness, but it has been languishing on the design wall lately.  To me, a project becomes a UFO when I start to dread it, rather than feeling excited about it. So I'm trying to recapture my excitement for this project!
My plan for this quilt is to use more detail to make it resemble an actual sycamore, rather than just a generic tree.  I'm challenging myself to work with a range of 5 values, rather than 3 as I have in previous quilts.
Here's an inspiration photo I took of a sycamore.


Here's the quilt so far.  It's kind of hard to tell what it will look like, because there are lots of big white gaps in it still. I will be filling the gaps in with a second color, just like a sycamore has both gray and white bark.  I haven't decided on the second color yet, but I'm considering green. I just need to make sure that there is enough contrast between the blue and green to show up.
Here's a close-up:
 
The Columbus Modern quilt guild is hosting a UFO challenge and I'm hopingit will motivate me to get this project done!