Thursday, June 27, 2013

Tutorial: How to quilt Kites

Here's a fun Free-Motion quilting design I first stitched last summer, when I was quilting a baby quilt with a "Kite Star" design.  I'll show you how simple it is to quilt!
 
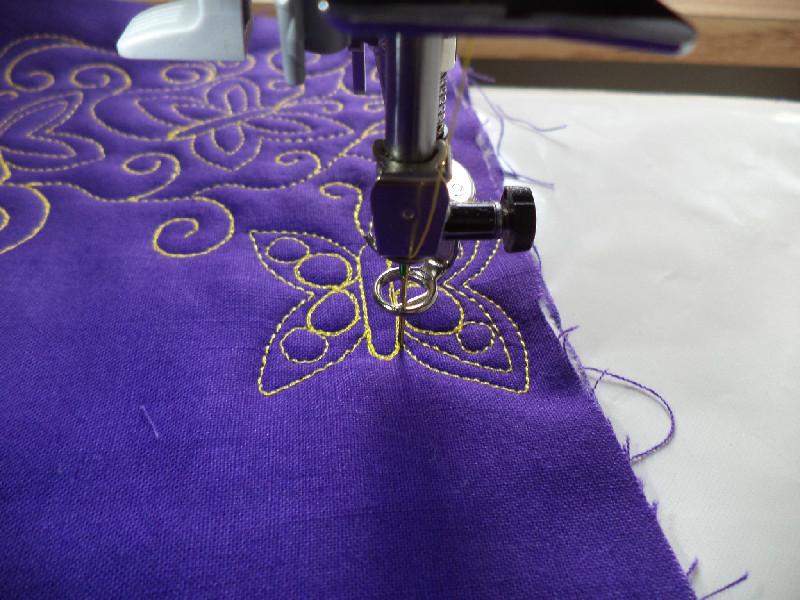
There's 3 simple parts of the design, and you'll put them all together:
1.  Kite
2.  Tail
3.  Loops
 
Let's see how you quilt it.
Kite:
1. Quilt a diamond.  You'll end up back where you started.
2.  Make a straight line to the tip of the kite.  Sometimes it's tricky to end up at the right spot.  It help me to keep my eyes on the point I'm aiming for, rather than watching the needle as I quilt.
 
Now you've finished the kite and the first part of the design is done!  Next, we'll do the tail.
3.  Make a curvy line away from the kite. Angle back toward the line to form a bow.
4.  Form a triangle, returning to the point where you started the tail. 
 
5.  Now make the other side of the tail, with a mirror-image triangle. You'll finish back at the same point.
 
6. Add as many tails as you like. I usually make 1-3 tails per kite. 
Then, when you are done with the tails, add some loops.  Use the loops to travel as you need through the quilting space, until you are ready for the next kite.
 
 
7. Add a few more loops.
8.  Now continue the design with kites and tails.
 
9.  Here's a fun variation.  Sometimes I think it's hard to quilt straight lines, and curves come more naturally.  If that's the case for you, why fight it?  Your kite can take inspiration from a manta-ray.  Quilt each line as a curve, sloping in toward the center of the kite. 
10. Whether you form the kite with straight lines, or with curves, remember to finish it by quilting a line through the center, ending at the bottom tip of the kite.
 
11. Finish up with tails and loops.
 
Have fun with the easy and free-flowing design! I'm linking up to FMQ Friday- check it out!

Thursday, June 20, 2013

Tree #1 is finished!

I finished up this quilt, which I started about a year and a half ago.  Although I've done a few projects in between, I worked on it pretty steadily, so it feels great to be done!
One thing I learned from making this quilt is how significantly quilting can change the look of piecing.  I made the background of many different pieces, with complicated curved piecing. Then I quilted over it with different colored threads, but I did not pay attention to the piecing lines as I did the quilting, as you can see in these closeups.  This blurred together the piecing.  I think this could be a nice effect in the right quilt, when you want to obscure the lines.  But in this project, I think it is a little disappointing.  Next time I'd like to try to accentuate the piecing, rather than overpower it. I'm really happy with the way the project turned out, and I'm not trying to nit-pick it, just analyze it to see what I can learn for next time.


Another thing I learned was how to make my feathers more flowing and graceful.  They certainly improved over the course of this project! 

The edges of this quilt are really wavy, as you can see!  I did block the finished and quilted top before putting on the binding. I used the method Ann Fahl explains in her book "Threadplay", in which you  hold an iron just above the surface of the quilt and steam it.  I think it helped a lot, but maybe next time I should do it to the top before quilting.  And maybe I will try blocking it by getting it completely wet.
I'm linking up to Off the Wall Fridays and FMQ Friday.

Wednesday, June 19, 2013

FMQ table runner

In a few weeks I'm teaching a free-motion class to some friends.  This will be a great learning experience all around- I will get some feedback on what topics to address and how to pace the class, and hopefully my friends will pick up some helpful tips.

I made samples of the designs we will be working with, and used the Quilt-As-You-Go method to join them into this table runner.
 
 
We will work on stippling,
 
loopy lines
 
and zippling
 
I tried taking these photos out on our balcony, because I thought the natural light would look better.  I'm not sure about the brown lawn chair as a backdrop though- too brown, maybe? 
This was my first try with Quilt-as-You-Go, and I liked it a lot. Leah Day has a great video tutorial on this method.  I'm not sure how often I'll use this technique though, because usually I make wall hangings, that aren't that big anyways, and hard to divide into blocks.  But it's always good to try something new!

Wednesday, June 12, 2013

Tutorial: How to quilt Field of Butterflies

When I was doodling around on the machine, trying to plan the quilting for Tree #2, I came up with this design that I'm calling Field of Butterflies. It uses Cucumber Vine, from the Freemotion Quilting Project, to connect the butterflies.
Here's how to quilt Field of Butterflies:
Step 1.  Begin with a few swirls of Cucumber Vine
Step 2.  Add a short, gently waving line.  Angle away from the work you've already done, into a relatively open area.  This gives you space to form the first butterfly.

Step 3:  Then, add 2 antennae.  This is important- angle the antennae back toward the line you just made.  This leaves the area in front of the needle open for the butterfly. This is the one step that is really different from how we usually do Cucumber Vine, but it is important to give yourself enough room for the next step.

Step 4. Form a long, narrow oval.  This is the butterfly's body.
Step 4.  Make the wings.  Make the top and bottom wing on one side of the body, travel stitch a short distance at the bottom along the oval, then form the wings at the other side of the body.  You will end at the top, or at the "head" of the butterfly.

Step 5: Fill inside the wings.  You can echo inside the existing wing shape, like I did here.
Or, add 2 pebbles to each wing.  I think it looks nice to taper the pebbles, by making a smaller one near the tip of each wing.  Then, I like to echo around the wing.

Step 6:  Use cucumber vine to move through your quilting space. Wherever you ended up in step 5, travel down the butterfly body so that your Cucumber Vine comes out from the bottom of the butterfly, at the opposite end from where you started. This is not really essential, but to me it is easier to evenly cover a space if I consistently end each butterfly at the bottom. 
That's all there is to it!  You are ready to add your next butterfly.  I think this would be a very pretty design on a quilt for a little girl.  Or on a pieced or appliqued butterfly quilt.
This is my first stab at writing a tutorial, so please let me know if you have any questions, or if anything is unclear!
I'm linking up to FMQ Friday.

I quilted it!

I was talking to my mom about my long list of quilting projects for the summer, and when I mentioned quilting this value quilt, she said, "Get it done in a day!"  Well, I got it basted AND quilted in one day- and the power went out during the quilting (okay, only for about 20 minutes).  This is a record for me!

I wanted it to stay soft and cuddly, because this is a quilt to use on the couch.  So I quilted it with an all-over, big scale leaf and loop design. It was hard for me to work on such a big scale and still keep the curves smooth.  It's not perfect, but it stayed soft and didn't stiffen up at all!  (Another first for me!)  This picture makes it look more wrinkly than it really is. 

 On the back I used this fun flannel.  It's "Little Spots" by Michael Miller, and I got it at The Fabric Shack.  What a great store! 
Now it's just waiting for binding.  I'm linking up to WIP Wednesday at Freshly Pieced- check out tons of inspiring projects!